Taking screenshots on a Windows laptop can be useful for a variety of reasons, from capturing and sharing an interesting meme to creating a document that requires several images. Regardless of why you need to take a screenshot, it doesn’t have to be complicated.
We’ve all seen someone frantically press the Print Screen button and then struggle to figure out what to do next. But don’t worry! We’re here to show you how to take screenshots quickly and easily on your Windows laptop. We’ll cover everything from the simple steps of taking a screenshot to more advanced features such as customizing your screenshots for clarity or sharing with others.
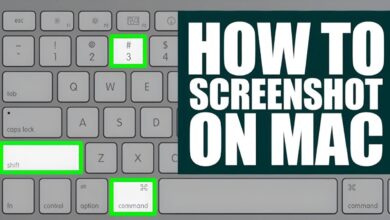
You may also want to know How to screenshot on Mac.
Whether you are new to computer use or just need a refresher course on how to utilize your computer better, this guide is the perfect place for you. Let’s get started!
Keyboard Shortcut to Capture Screenshot on Windows
Have you ever wanted to capture your screen in real-time to show someone what you’re seeing on your Windows laptop? Taking screenshots is actually easier than you think! In this guide, we’ll show you how to take a screenshot on Windows laptops using a keyboard shortcut.
The two keys needed for capturing screenshots are the PrtScn (Print Screen) key and the Windows key. You can find the PrtScn key at the top-right side of most keyboards, usually next to the F12 button. It’s usually labeled “PrtScn”, “PrntScrn”, or “Print Scr”. The Windows key is located between the Alt and Ctrl keys at the bottom-left side of your keyboard.
To take a screenshot of your entire screen, press and hold down the Window Key and then press PrtScrn — this will save an image file on your laptop. Alternatively, to capture only part of your screen, press the Window Key + Shift + S — this will open an editing window where you can select a specific section of your screen.
Once you have taken a screenshot, it will be saved on your laptop in PNG format in a file labeled “screenshots.” The screenshots folder is located in Pictures in File Explorer and contains all of your screenshots as image files.
Using Snip & Sketch Tool to Create a Screenshot
The latest version of Windows, Windows 10, comes with a built-in tool known as Snip & Sketch. This tool is designed to help you create screenshots on your laptop quickly and easily. Here’s how to get started:
- Open the Snip & Sketch app from the Start menu or search bar.
- Once the app has opened, click on the New button in the upper-left corner of the window to start a new screenshot.
- You will then be presented with several options for capturing a screenshot:
- Full Screen: Takes a screenshot of your entire screen.
- Rectangular Clip: Creates a screenshot based on the rectangular area you select.
- Freeform Clip: Creates a screenshot based on any arbitrary shape you wish to draw.
- Window Clip: Captures the contents of a single window or app that you have open on your laptop screen.
- Once you have selected your desired option, simply drag your mouse over the area you want to capture and click Save, and then your screenshot is ready to be used however you wish!
How to Take Partial Selections With Snipping Tool
Using the Snipping Tool, you can capture a portion of your screen – even more convenient if you only need to take a screenshot of one area.
To take a partial selection screenshot, follow these steps:
- Open the Snipping Tool by searching for it in the Start Menu, or using Cortana.
- Click the “New” button to start the snip selection.
- A crosshair will appear on your screen, use it to select the area you want to capture, and left-click and drag it around that area. When done, simply release the left-click.
- A preview of your screenshot is displayed in the Snipping Tool window – you can save it or copy it to your clipboard by clicking “Save” or “Copy” respectively.
- You can also add notes and highlights before saving or copying your image by clicking on the pen icon at the top left side of the tool window and selecting a pen color to draw in desired areas.
Edit & Annotate Your Screenshots
Screenshots are helpful in many situations, but what if you need to make changes or add notes to your image? Luckily, Windows 10 includes built-in tools to do just that.
Here’s how to edit and annotate your screenshots in a few easy steps:
- Select the screenshot you want to edit.
- Right-click on the screenshot and select “Edit”.
- Choose from a variety of annotation tools such as lines, arrows, shapes, highlighting, and text boxes. You can also crop and rotate your image if needed.
- Once you’ve finished editing, click the “Save” button or “Share” button to save your screenshot or share it with others instantly.
With the ability to quickly capture, edit and annotate screenshots on Windows laptops, you can instantly share information with others or keep track of important information for yourself!
Conclusion
Taking a screenshot is a great way to save and share what you were doing on your laptop. It’s easy to do and has a variety of uses. Whether you’re creating a presentation or troubleshooting a tech issue, having a screenshot is invaluable. By following these simple steps, you can quickly and easily take a screenshot of your Windows laptop, so you can be sure that you never miss a moment.


